SCIENCE SAFARI
  • Science Safari
  • Toy Store
  • Science Classes
  • Parties
  • Contact Us

Limp Hearts Still Have Love

5/16/2017

8 Comments

 
This was an adorable project, especially with the timing of Mother's Day, but we did struggle to keep the heart models inflated for an extended period of time.  Eventually we decided it was better to make a model that could be  re-inflated when it went flat.

If you have a heart model that is fastened together with heavy tape, you can change it easily to rubber bands.  Just pull off the tape, and any foam that is wrapped around the ends of the tubes.


Reinflating Instructions
After removing any tape and foam pieces, slide a balloon on one end of the tube and fasten it by wrapping with a rubber band several times.  The blow into the other end of the tube to inflate the balloon to slightly larger than your fist.  Quickly twirl the balloon so that the neck twists and traps all the air inside the balloon. Hold the balloon firmly in your armpit while sliding a second balloon on the end of the tube you were just blowing in.  Fasten that balloon on with a rubber band. Let the first balloon untwist so some air pops back into the second balloon.  Then you can slip the glove back over one of the balloons to make your heart beat.

8 Comments

Extracting DNA from a strawberry

5/3/2017

9 Comments

 
Strawberries are the perfect choice for a DNA extraction lab for two good reasons: (1) they have much more DNA than other fruits, and (2) they are octoploid, meaning that they have eight copies of each type of DNA chromosome.

1. Put a bottle of isopropyl alcohol in a freezer. 
2. Measure 6T (90 ml) of water into a small glass container.
3. Add 2 tsp (10 ml) dish soap to the water.
4. Stir in a ¼-tsp salt and mix until the salt dissolves. This is the extraction mixture.
5. Place one strawberry into a plastic zipper-lock bag.
6. Pour the extraction mixture into the bag with the strawberry.
7. Remove as much air from the bag as possible and seal it closed.
8. Use your hands and fingers to mash, smash, and moosh the strawberry inside of the bag. You don’t want any large pieces remaining.
10. Pour the resulting strawberry pulp and extraction mixture through a strainer and into a medium glass bowl or similar container.
11. From the container it’s in now, pour the extraction mixture into a smaller glass container that holds ¼- to ½-cup (50-100 ml) of fluid. This will help to isolate the DNA on the surface of the mixture.

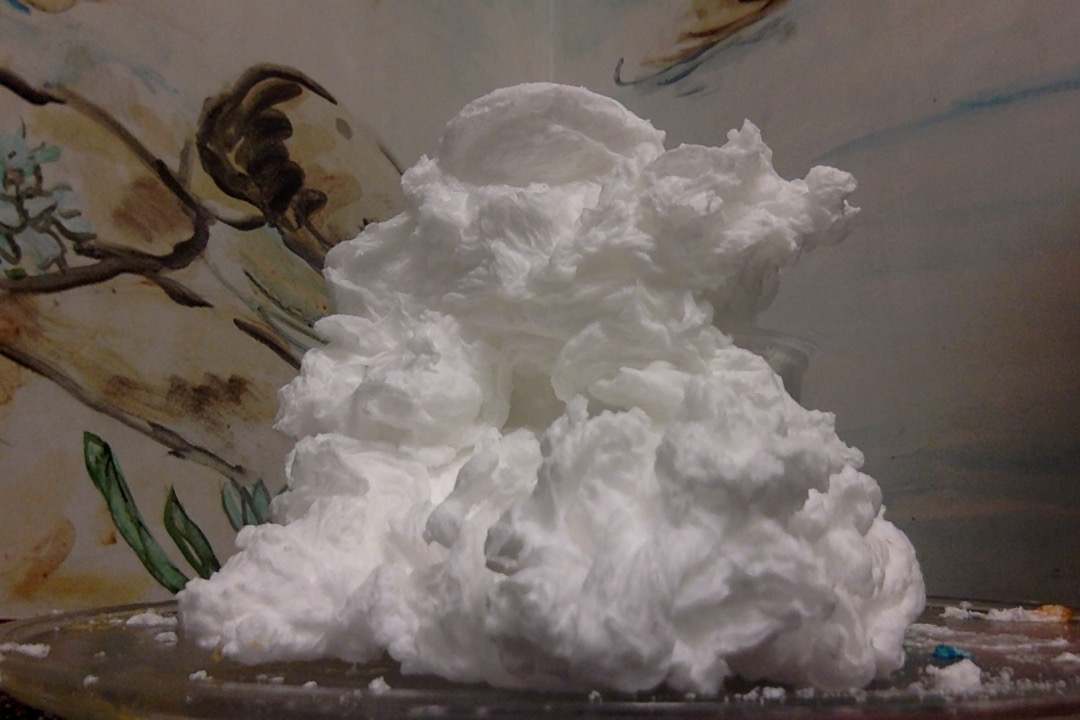
12. Add 1 tsp (5 ml) of the chilled isopropyl alcohol to the solution and hold the mixture at eye level. The white layer that forms on on top is the DNA of the strawberry!  It may take a minute or two for the DNA to develop, so wait patiently. 

Don't stir the mixture at this point, or the DNA will fall apart again.  You can gently scoop it out with a toothpick.


9 Comments

Magical Illusions

11/4/2016

19 Comments

 
Holographic Projectors.  And we thought these were only found in Star Wars!  In class this week, our 3-5 graders made their own holographic projectors.  By playing a specially designed video on your phone or ipad, and setting the projector on the screen, you can create an illusion of the video in the air. 

Here are the links that you will need:

Holographic video
https://www.youtube.com/watch?v=TFNY5OUmh5I

Template for building a projector
https://www.microsoft.com/en-gb/developers/articles/week02jan16/how-to-create-3D-holograms-on-your-phone-and-why/

19 Comments

Grossology Science

10/27/2016

6 Comments

 
Picture
This was the grossest class ever! We found it interesting that many things we
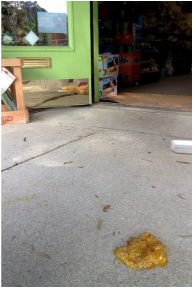
consider gross have to do with our bodies - like farting and burping and vomiting.  But without these things, we'd be in trouble, biologically speaking! For our project we made fake vomit. If your fake vomit didn't set completely and stayed a little soft and gooey, here is the recipe we used if you want to
try again.

Fake Vomit Recipe


(1) First, put together the undigested food that is being vomited up.  Mix together in a bowl:
1/2 cup oatmeal
2 tablespoons flour
1/4 tablespoon cocoa powder

(2) Now you want to make some bile.  This super strong alkaline chemical is what helps you digest your food in your stomach.

 In a separate cup, mix together:
1/4 cup of warm water
1 packet of gelatin (We used clear gelatin)
2-3 drops of yellow food coloring

Stir up the gelatin and water until all the gelatin is dissolved. 


(3) Repeat Step (2) in a separate cup and set this second cup aside for now.


(4) Then pour the first cup of gelatin mix into the bowl with the undigested food and mix everything together until well blended.  If necessary, add a little more water, but be careful not to add too much or it will become runny.

The mixture should start to thicken as the gelatin cools and sets. Dump it onto a plate.  Pour the second cup with the gelatin mixture over the pile.  Let it run down and off the edges. 

Now put your plate in the fridge.  The gelatin should set enough to peel the whole thing off the plate within an hour or so.

Place it on your front step or sidewalk to surprise your friends!


6 Comments

Ancient Egypt

9/17/2016

13 Comments

 
Many programs about Egypt focus on mummies and pyramids, but there is so much more to ancient Egypt!

1.  It spanned 4000 years, and there were times of grandeur and massive pyramid building, but in the early years, there were no kings and everyone lived simply in their own village.

2. The Egyptians aren't the only peoples to make mummies.  They have been found in South America, Alaska and even Scotland.

3. We had a blast learning from an ancient egyptian doctor how they cured various diseases. The kids thought some of the medicines were hilarious!  Although eating moldy bread does sound pretty disgusting, there is  evidence that the Egyptians actually knew about and acquired penicillin by growing mold on bread, the same way it was "discovered" by Alexander Fleming in 1928.
13 Comments

Extreme Animals

8/23/2016

7 Comments

 
There are some animals that can survive under immensely tough conditions - blazing hot desert sands, freezing cold and bitter winds, or seriously high pressure, and no oxygen environments.  These adaptations allow them to occupy a niche that no one else does, which is their strategy for long term survival.  Our desert tortoise Lulu comes to class this week to demonstrate the adaptations it takes to live happily in the dry African grasslands and desert.
7 Comments

Kitchen Chemistry!

8/4/2016

3 Comments

 
Picture
Everything we used in class this week was edible, other than the soap and laundry detergent.  This is the one time you get to taste everything in the lab!
For making soap creations at home, the size we used works best when you  put them in the microwave for 30 seconds.  They still work great as soap, and they will float like icebergs in the bath tub.

3 Comments

Ornithology

7/30/2016

1 Comment


Vote on a project we can do to improve our shopping center for birds, people and nature.  Based on our results from mapping the local community, we've come up with several ideas.

Create your own user feedback survey
1 Comment

Weird & Wacky Museums

6/15/2016

3 Comments

 
So you may not have realized it, but you can make musical instruments out of carrots...and other vegetables.  I learned this at the World Museum of Carrots, which I found during my research for this week's class.  Who knew?!
There are some unusual collections out there, like the British Lawnmower Museum, the Mustard Museum, and the Underwater Museum (which you have to visit by going underwater because all the exhibits are down there).
Museums originally started with the Library of Alexandria (a true home for the muses), then as British explorers built their collections, everyone had to have a "Cabinet of Curiosities."  These eventually grew into a "Roomful of Curiosities" until they got so big they had to be donated to a university.  I can imagine some British wife becoming exasperated with the piles of unorganized curiosities taking over the house, and complaining "Either this goes or I do!" Thus the modern museum was born.
3 Comments

Amazing Insects

6/8/2016

3 Comments

 
The Lost Ladybug Project is a citizen science project that helps scientists track the populations and kinds of ladybugs in the US.  You can participate by taking pictures of ladybugs you find and posting them to the Lost Ladybug Project website.

Once your submission is in their database, it will show up in the lists and on the maps.  You can check out the different kinds of ladybugs that that thye are tracking.


3 Comments
<<Previous

    Author

    Siobhan O'Neal

    Archives

    May 2017
    November 2016
    October 2016
    September 2016
    August 2016
    July 2016
    June 2016
    May 2016
    April 2016
    November 2015
    August 2015
    May 2015
    February 2014
    January 2014
    November 2013
    October 2013
    September 2013
    July 2013
    June 2013
    May 2013
    April 2013
    March 2013
    February 2013
    January 2013
    November 2012
    October 2012
    September 2012
    August 2012
    July 2012
    June 2012

    Categories

    All
    Introduction

    RSS Feed

Web Hosting by FatCow
  • Science Safari
  • Toy Store
  • Science Classes
  • Parties
  • Contact Us